Happy Christmas to everyone!

Thank you to all of you who have been following my blog during the year – I do love writing it, and of course doing all the stitching  🙂

Have a great Christmas, and here’s to a stitchy New Year for you with lots of lovely projects to make, both ‘full size’ and ‘dollhouse size’, and all the time you need to do them!

Christmas dollhouse


I am going to be taking a break from regular posting on this blog, to allow some time for renovating the house that my husband and I have recently moved into – it’s a bungalow in Cornwall, and will be lovely when it’s finished, but we need to do a lot of work on it, so something’s got to give, to allow us the time! At the moment, there’s no time for stitching  😦  but I hope to get back into doing some soon.

~~~~~~~~~~~~~~~~~~~~~~~~~~~~~~~~~~

Dollhouse Needlepoint newsletter sign-up invitation

Victorian Pincushion on spindle stand: 7 – assembling the ‘strawberry’

The little emery ‘strawberry’ is the final part that I need to stitch as part of the Victorian Pincushion on a spindle stand project that I am making from the Victoria sampler chart  booklet.

Victorian pincushion embroidery by Victoria Sampler

This is a pretty little ‘small’ that didn’t take long to stitch. To make it up into the actual strawberry, I first trimmed the fabric to within a centimetre of the running stitch outline round the embroidery. Then I folded the fabric in half and stitched a backstitch line just inside the running stitch (so that I didn’t need to bother removing the running stitches later), to make the fabric into a cone.

Embroidered emery strawberry

Next, I turned it right side out, and ran a line of running stitches around the top edge using number 12 Perle thread.

Embroidered emery strawberry

I lightly stuffed the shape with wadding (not emery powder, as my strawberry is only going to be decorative!). I pulled up the ends of the thread, turning in the seam allowance at the same time, and knotted the thread to make the strawberry shape.

Embroidered emery strawberry

It looked a bit messy at this stage, but the embroidery will cover that up, hopefully!

Embroidered emery strawberry

I then stitched a few long straight stitches in dark green silk around the top of the strawberry, and then added three little silk ribbong bows in dark green. Finally, I added a central loop in variegated silk ribbon and tied a small bow at the top, to hang the strawberry by, on the pincushion spindle.

Embroidered emery strawberry

And this is it finished:

Embroidered emery strawberry

So, my lovely Victorian Pincushion etui set is now complete! I am really pleased with this. It will look lovely in my glass display cabinet with all my other embroidery, but will also be useful when I’m doing even more embroidery.

Embroidered Victorian pincushion on spindle stand by Victoria SamplerThis is such an unusual project from Thea Dueck of Victoria Sampler. Take a look at her website to see lots of other unusual and creative embroidery projects.

~~~~~~~~~~~~~~~~~~~~~~~~~~~~~~~~~~

Dollhouse Needlepoint newsletter sign-up invitation

Victorian Pincushion on spindle stand: 6 – stitching the ‘strawberry’

This week  I’ve stitched the embroidery for the little ‘strawberry’ that will hang from the Victorian Pincushion spindle stand with the  needlebook. Here’s the front of the chart booklet, to show you what I mean:

Victorian Pincushion embroidery

It’s the tiny thing hanging down on the left! It’s supposed to contain emery powder, to help clean needles, but I have tried making one of these before with emery powder in, and it is very messy black stuff that gets everywhere. So, as this is really just a decorative ‘small’, I’m going to make mine just stuffed with wadding instead, I think.

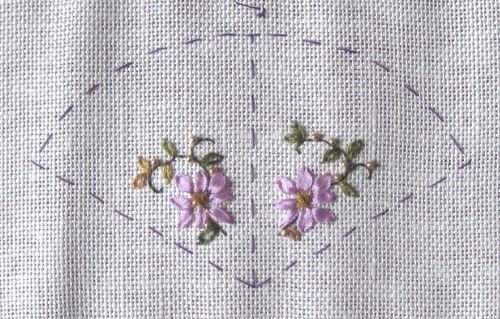
The embroidery design is a motif taken from the top circular design, and it doesn’t take long to stitch two repetitions:

Strawberry emery design

I just need to stitch it into a cone shape and stuff it now, and this project will be finished.

~~~~~~~~~~~~~~~~~~~~~~~~~~~~~~~~~~

Dollhouse Needlepoint newsletter sign-up invitation


You don’t have to have a dollhouse to stitch mini things!

This little framed picture is stitched on 40 count silk gauze, and is a unique version of my ‘Elizabeth’ rug design, which usually is stitched on 18 count canvas with Appleton’s crewel wool. But Lorna, one of my customers, decided to do this tiny petit point version, which only measures 4 x 4 inches, and is framed in a picture frame just 9 inches square! It’s so cute when it’s stitched this small!

Dollhouse rug kit

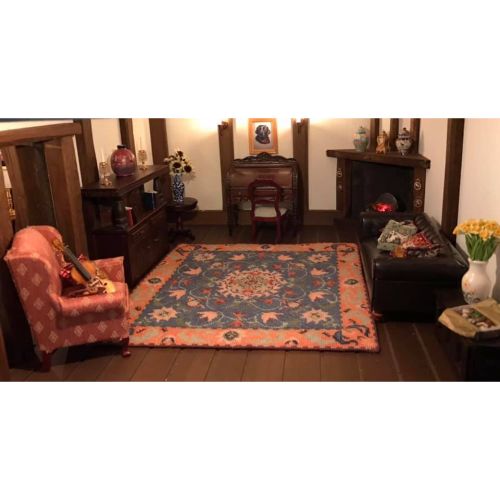
Here are some more pictures of the ‘Elizabeth’ rug that other customers have sent me, in more traditional mini settings. They are all wonderful in their own way.

Dollhouse rug kit in doll's house

Dollhouse rug kit in doll's house

Dollhouse rug kit in doll's house

The design is based on a William Morris ‘Hammersmith’ rug, in gorgeous shades of blue and burnt orange. If you’d like to stitch one of these, the needlepoint rug kit costs 28.95 GBP and is available here. The kit contains Appletons crewel wool, a suitable needle, detailed instruction, and 18 count canvas (you count the design from a colour block chart – the design is not printed on the canvas). The finished size of the rug when stitched from a kit is nine inches square.

Visit my Dollhouse Needlepoint kit website or my Etsy shop site now (the Etsy one is better for mainland European customers). All kits are in stock, and I ship worldwide.