Embroidery in progress: An Elizabethan Stumpwork Bride’s Bag – 7

I’ve got to the stage with this project that I often do with embroidery….I’m starting to look around for what my next project will be, so there’s a risk that if I put this one down for a while, I might never pick it up again, which would be a shame, as I’ve got so far with it! So, this weekend I made sure I gave myself enough time to get a serious chunk of the embroidery done, to keep my interest up!

This little butterfly is just a ‘filler insect’ in this projet, but I’d got to the stage where I didn’t even bother to read the instructions to see how Shirley Holdaway (in her book ‘Festive Elizabethan Creations’), expected me to do it…I’d decided I wanted it to be a yellow butterfly, with bead highlights on the wings. The wings were worked in long and short stitch, using Anchor 306 deep yellow and 292 pale yellow, and the body and antennae were worked in one strand of dark green/grey (just a spare bit I had in my workbox, so I don’t know what shade it was!).

At this point, I finished off the foxglove flowers. The instructions said to take a small ball of thread ends in pink shades, and glue them high up inside the bell of each foxglove flower, to hold the tube open. I didn’t want to risk getting glue on a part of the stitching that would be visible, so I just poked the ball of thread hard up into the flower ends, and they seem to be staying put! The method certainly works to hold the curved part of the flower up, and stop it squashing flat.

I had left the beading highlights until now, in case my thread kept catching on the beads as I was stitching other areas of the bag. So, I stitched on three or four maroon seed beads to the mouth of each flower at this point, which actually made them look a lot more ‘finished’ than I’d expected. In this photo, you can see the tiny ladybird as well. There is also a ladybird on the other side of the bag, which I like better, as it has its silver wings showing on that side .

As with the first side, the last thing to add was the clusters of frosted yellow beads, in groups of three. These are stitched fairly randomly over the bag, filling any gaps that seem too ’empty’. One cluster had to be placed quite carefully, though, as I had managed to attract a speck of soot (we have an open fireplace in our living room!) which had lodged itself onto the top left hand corner of the stitching, and trying to wash it off only made the mark worse. Fortunately, three seed beads hid the mark completely. Now I keep my stitching-in-progress covered up  🙂

So, at this point, the second side of the bag looks like this.

~~~~~~~~~~~~~~~~~~~~~~~~~~~~~~~~~~

Dollhouse Needlepoint newsletter sign-up invitation


Want to know about a brilliant tapestry and cross stitch shop in South Wales?

I recently visited a friend of mine, Karen Dixon, who lives near Abergorlech, in South Wales. No, I’d never heard of the place before, either. But it’s a lovely area, about 25 minutes’ drive from Llandeilo, with wonderful views across the valleys, very few people, and lots of sheep.

Karen has been running her own tapestry and cross stitch design business from Cathilas Farm for about 10 years now, since she moved there with her partner, Richard, from Hampshire.

I hadn’t visited the two of them for about eight years (long story – I think life just got in the way. Oh, and it’s a five hour drive from where my husband and I live, in the Peak District. That might have something to do with it!).

Anyway, the last time we visited, in 2004, they were just about to embark on renovating the barn that adjoins their house, to make it into a design studio and shop, selling other people’s kits, as well as Karen’s, under the business name of the Tapestry Kit Collection. So, this was the first time I’d seen the barn completed, although I’d heard about the project as it progressed.

But the finished barn has to be seen to be believed!!!! It’s got dozens and dozens of tapestry kits, by all the main UK designers, a good range of cross stitch kits, and a large range of trammed tapestries in stock. Stitched models are all around the room. There’s even a cosy log-burner in the corner, with squashy chairs to sit in while you choose what to buy (or the corner could be used as a ‘men’s creche’. Just a thought…..). Have a look at these images, which show a selection of what you’ll find in the shop:

The shop is open 11am till 4pm each Wednesday, and either Saturday or Sunday most weekends (other times by appointment  – phone 01558 685096). Phone before travelling, though, to make sure someone will be there to meet you. The address is Cathilas Farm, Abergorlech, Carmarthenshire SA32 7TB, and the website is here.

And a note to Karen: thanks for big bundle of spaced-dyed threads! They’ll keep me busy for months  🙂

~~~~~~~~~~~~~~~~~~~~~~~~~~~~~~~~~~

Dollhouse Needlepoint newsletter sign-up invitation


Embroidery in progress: An Elizabethan Stumpwork Bride’s Bag – 6

Now that the bluebells have been finished, the next flower to tackle was the pansies on the right hand side of the Elizabethan stumpwork bride’s bag (the design is from the book ‘Festive Elizabethan Creations’, by Shirley Holdaway).

The instructions said to use the detached buttonhole stitch (again), but as I’ve said before with this project, I feel that the stitch is used too much in this project, and I like doing long and short stitch / satin stitch filling more! Also, pansies are very delicate little flowers, and I felt that a textured stitched like detached buttonhole wasn’t really right for this kind of flower.

So, I outlined each petal shape first with chain stitch, using one strand of Anchor each time, and then worked long and short stitch in the relevant colour for each petal, starting with the darkest purple each time and working down the flower to the yellow. To define each petal better, I added a straight stitch between each petal in light green (Anchor 858).The highlighting thread to make the ‘face’ of the pansy was stitched with black fine sewing cotton, as I had tried it with black Anchor (shade 403), but it seemed to be a bit ‘fluffy looking’ on such a small flower, so I unpicked it. The centre of each pansy was finished off with a gold seed bead, stitched down at three points, to make sure that the hole of the bead stayed facing upwards. Even with such simple colours used for these flowers, I felt they came out really well. I like pansies – they have a lot of character.

The pansy leaf was stitched in detached buttonhole with two strands of light green (Anchor 858), as per the instructions – worked along the leaf shape from stem to tip. Then, using a darker shade (216), I added buttonhole around the entire shape, and stem stitch for the veining of the leaf.

~~~~~~~~~~~~~~~~~~~~~~~~~~~~~~~~~~

Dollhouse Needlepoint newsletter sign-up invitation


Embroidery in progress: An Elizabethan Stumpwork Bride’s Bag – 5

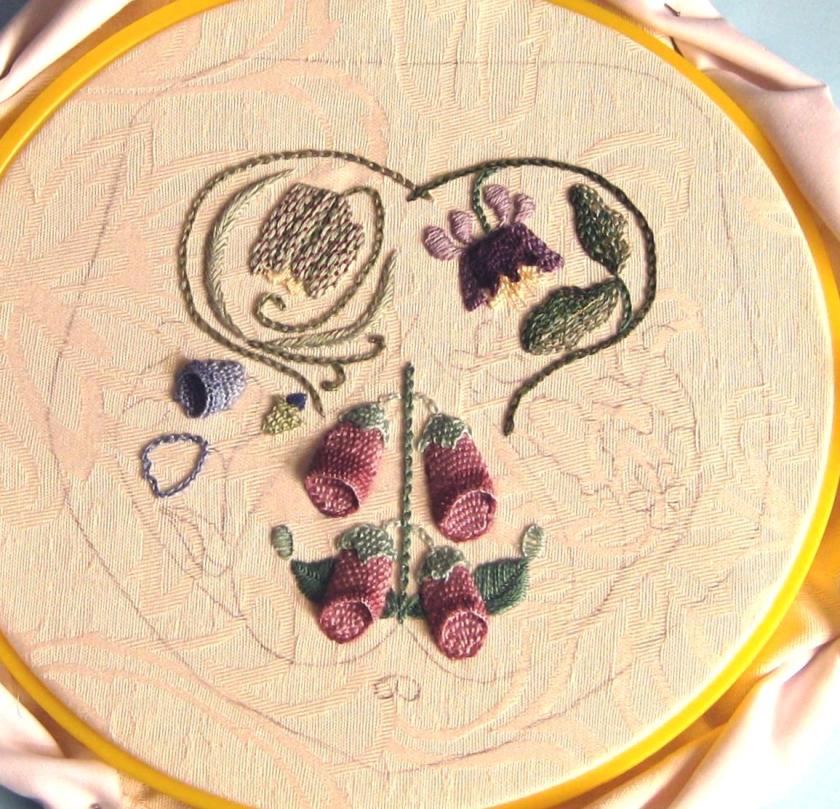
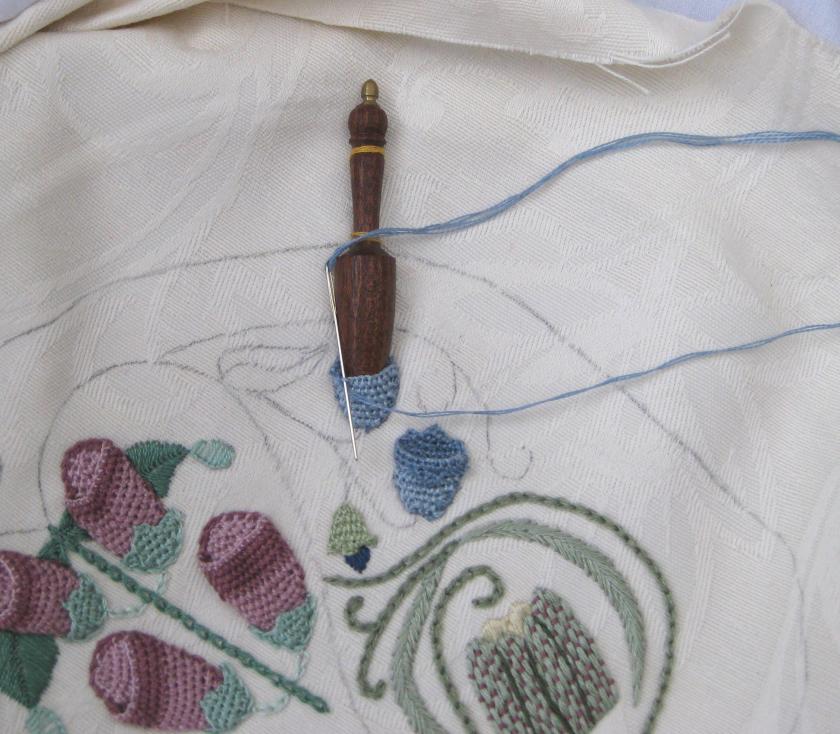
The next flower to be tackled on this second side of the Elizabethan stumpwork bag (from the book ‘Festive Elizabethan Creations’, by Shirley Holdaway) was a bluebell. Basically, they are stitched in the same way as the foxglove flowers, only smaller.

I started to stitch them late one evening, so there aren’t any ‘in progress’ photos for the first flower, as the light was too bad to take photos. The second flower came out differently to the first one, as I didn’t bother reading through the instructions a second time, so it came out wrong (there’s a lesson in there somewhere!). Take no notice of the ‘squashed’ foxglove flower in the photo below – it hasn’t been given its padding yet!

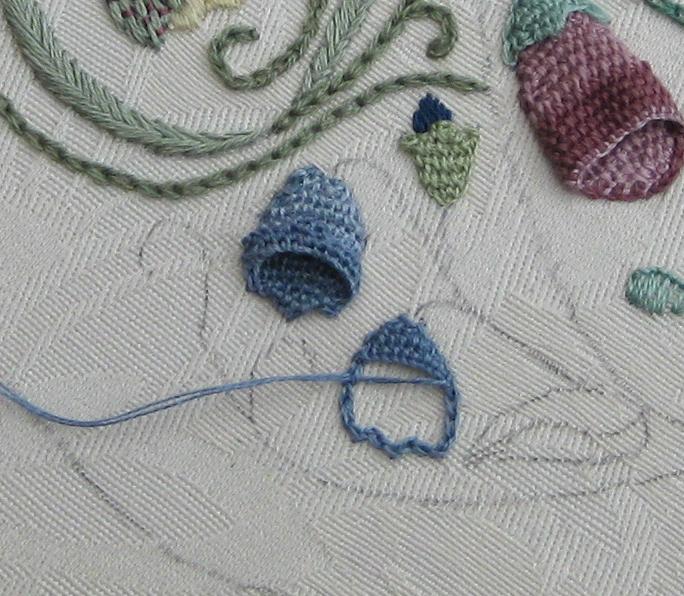
As with the foxglove flowers, I began each flower by outlining the shape with chain stitch in one strand of Anchor, then I filled the shape with detached buttonhole stitch, using two strands of the same shade (and a tapestry needle in stead of a sharp, so that the needle didn’t catch so easily on the surrounding fabric or embroidery already completed).

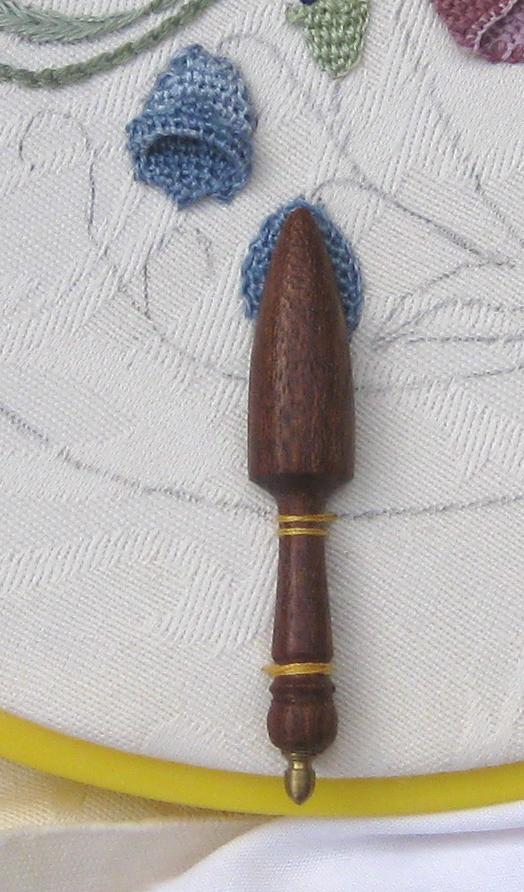
Then I used the half cone stick as before, tacking it to the fabric while the fabric was still in the hoop, to get the placement of it correct, and then working the lifted up detached buttonhole stitching with the fabric out of the hoop, as it was almost impossible to get the ‘catch stitches’ at each side of the rows in place with the fabric in the hoop.

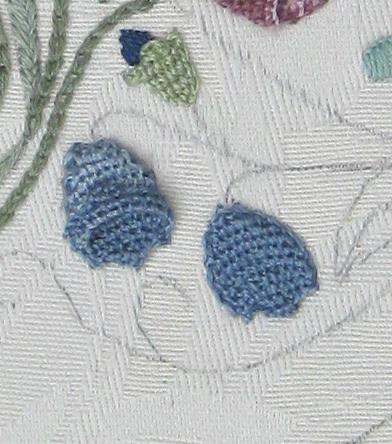
Unlike the foxgloves, which just had plain rows of this stitch, the bluebells had a nifty ‘turn back’ at the end of the petals. This meant turning the fabric up the other way, and working a few rows back in the other direction. Using a slightly darker shade starting from this point also accentuated the turn back. I also had to make a wavy edge to the final few rows, to make them more realistic, which I achieved by looping the foundation thread from the right to the left in short sections, and working each petal end individually.

This turn back part was where I did it wrong on the second bluebell. If you compare the two flowers, the one on the left has a straight edge to it where the turn back occurs, whereas the one on the right doesn’t. This is because I forgot to use a foundation thread when I worked the first turn back row on the right hand flower. Although it’s OK (meaning, I couldn’t be bothered to unpick it), it annoys me now! It could be seen as the ‘variation of Nature’, I suppose, but I’d wanted them to be the same 😦

Shirley Holdaway recommends stitching small blue beads at the mouth of each bluebell flower, but I felt that that would be too much for such a small flower, so I left them plain.

~~~~~~~~~~~~~~~~~~~~~~~~~~~~~~~~~~

Dollhouse Needlepoint newsletter sign-up invitation