Carolyn Pearce Strawberry Fayre heart etui 30: how to make a needlelace berry

I am currently stitching the Carolyn Pearce Strawberry Fayre heart etui as a stitchalong project. This week, I am explaining how to make a needlelace berry to use as a closure on the etui. See the end of this post for all the information you’ll need to join in!

~~~~~~~~~~~~~  ***  ~~~~~~~~~~~~~

This is what we’re aiming for this week – this is the image from the Inspirations magazine number 95. It’s the little berry on a cord that is used to wrap around the Dorset button to keep the etui closed.

Carolyn Pearce Strawberry Fayre needlelace berry

It starts as a semi-circle of felt. You stitch a small seam up the straight sides to make a small cone of felt, and then run a gathering thread around the top curved edge.

Carolyn Pearce Strawberry Fayre needlelace berry

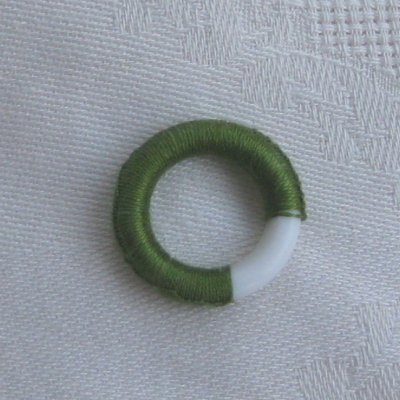
You’ll need to have a piece of twisted cord ready before you stuff the cone with a small piece of wadding and draw up the thread, because the cord needs to be stitched inside as you go. So, make the cord first with two x one metre long lengths of Perle 8 green. The instructions say to make a half hitch cord, but I found that too lumpy, so I made a simple twisted cord the same as for the thimble holder (see blog post number 25 for that). Thread on the gold bead cap before making a large double knot at the end that will be inside the berry, so that it won’t slip out, and make sure that the ‘neat’ end of the cord is the correct length (you won’t be able to trim this neatly later, it must be correct now!). I made mine 4 1/2 inches from the top of the actual berry to the neat end, so allow more to go inside the berry and be knotted. There’s a temporary knot near the neat end in the image below, but that’s only to stop the bead cap falling off! You’ll undo this later.

Place the knotted end of the cord inside the berry, draw up the gathering thread and stitch across the opening, making sure you stitch through the cord as well, several times. Squish the berry into a proper berry shape at this point. It’s very small – about half an inch long.

Carolyn Pearce Strawberry Fayre needlelace berry

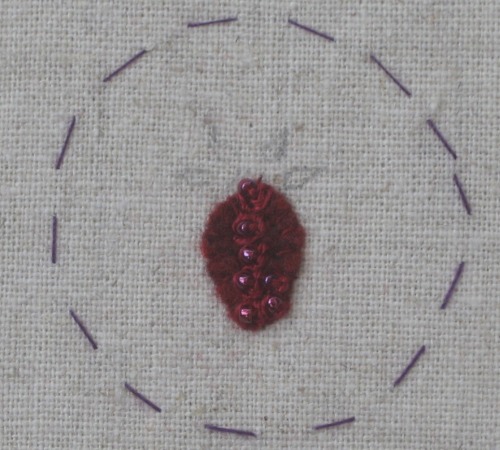
Then comes the fun part – covering the felt berry shape with needlelace. To do this, first lay a base layer of vertical stitches down the outside of the berry from the top to halfway down the side, using one strand of a metre length of Silk ‘n’ Color 1055 Cherry Field (substitute) with a sharp needle. Then change to a tapestry needle and continue with the same thread, making detached buttonhole stitches under each of the vertical stitches, going round and round. After the first row, you’ll be stitching into the loops of the previous buttonhole stitches, not the vertical ones. Increase until you reach half way down, then start to decrease, until the whole berry is covered.

Carolyn Pearce Strawberry Fayre needlelace berry

The sepals are then worked in Lazy Daisy stitch in Anchor 268 (substitute) around the top (I found the needlewoven picots that the instructions suggested just impossible at this scale!).

Carolyn Pearce Strawberry Fayre needlelace berry

Push the bead cap down tight to the berry top, then knot the cord just above it, holding it in place. The neat end of the cord will be stitched to the V of the back heart later (not now!!).

Carolyn Pearce Strawberry Fayre needlelace berry

Put it aside somewhere safe, as you won’t need this for a while, and it’s very small…..

~~~~~~~~~~~~~  ***  ~~~~~~~~~~~~~

~~~INFORMATION~~~

The Strawberry Fayre design, plus the complete list of materials, appears in Inspirations magazine number 95The publishers do sell a full materials pack  (not including the mother of pearl ruler though!), but it’s rather expensive, so if you can use your stash, and just fill in with bits and pieces, then so much the better! The magazine is published in Australia – if you live in the UK, as I do, it is cheaper to buy a back copy from Manor House Magazines, and save a lot on the shipping. 

EDIT: The materials pack from Inspirations, and the magazine from Manor House in the UK are not available any more as at March 2018 – I don’t know if any more stocks will be available now, unfortunately. The publishers may bring out a digital pattern pack later, which they sometimes do with popular projects from their magazines, but we’ll have to wait and see…..

To read about this project stitchalong from the beginning, start here. The post about which FABRIC to use is here. The post about the THREAD SUBSTITUTIONS that I made, plus WHERE TO BUY the threads and beads, etc., is here.

To look up all the posts in this series in the sidebar, see under the CATEGORIES list, under: Embroidery / Full size (others’ designs) / Strawberry Fayre heart etui, or use the SEARCH BOX at the top of the blog, and search for ‘Strawberry Fayre’ to get a list of all the posts (but it’s in reverse order, sorry!).

I’d be interested to see images of how your project is progressing – please email large, clear, well-focused images to mail@janetgranger.co.uk  Please bear in mind that any images sent may be used in this blog and/or social media such as Facebook or Pinterest.

~~~~~~~~~~~~~~~~~~~~~~~~~~~~~~~~~~~~~~~~

Are you interested in doll’s houses and stitching? Then why not visit my website, where you can buy doll’s house needlepoint kits to make all kinds of soft furnishings for one-twelfth scale dollhouses. There are over 280 kits to choose from, plus chart packs, fabric project packs, tutorials, and lots of eye candy to inspire you! Kits are available on 18 and 22 count canvas, 28 and 32 count evenweave, and 32 and 40 count silk gauze, so there’s something for everyone – from beginners to experts.

~~~~~~~~~~~~~~~~~~~~~~~~~~~~~~~~~~

Dollhouse Needlepoint newsletter sign-up invitation


Carolyn Pearce Strawberry Fayre heart etui 28: how to make a Dorset button

I am currently stitching the Carolyn Pearce Strawberry Fayre heart etui as a stitchalong project. See the end of this post for all the information you’ll need to join in!

~~~~~~~~~~~~~  ***  ~~~~~~~~~~~~~

To make the closure on this heart etui, I needed to learn how to make a Dorset button. I’ve never made one before, but the instructions in Inspirations magazine 95 looked very detailed, with lots of pictures, so I thought it shouldn’t be too difficult. Ha ha ha!

To start off with, the instructions said to use a plastic ring with a diameter of 15mm (5/8ths of an inch). Hmm. Well, in the UK at least, that seems to be impossible to buy. Maybe it’s possible in Australia, where Carolyn Pearce lives. I had to get a 3/4 inch diameter ring, made by Hemline, so my Dorset button looks ‘chunkier’ than her one.

The instructions said to use one strand of Gumnut Yarns stranded silk – but I’m using substitutes for almost all the colours, so I used one strand of Anchor stranded cotton in shade 266 Moss green, and a size 26 tapestry needle. I wasn’t at all sure that the coverage would be enough with just one strand, but it looks OK. I started by knotting the thread around the ring, and made blanket stitches over the ring, trapping the tail of thread at the back as I went.

How to make a Dorset button

I had thought that using their recommended length of thread (60 inches) would be plenty, even though my ring was larger than theirs, but I ran out at this point:

How to make a Dorset button

Tying in another length was messy, and fiddly, but I got there in the end! I used another 50 inch length, which was enough to finish the ring, work the spokes and do the wraps (but I didn’t bother to do the edging stitch as in the magazine, as that was just too fiddly for me!).

How to make a Dorset button

Using the same thread as for the blanket stitch, without cutting the end of thread and starting again, I started wrapping it around the ring to make eight spokes on the wheel. I worked a few cross stitches across the centre to bring the spokes together, and hold them tight.

How to make a Dorset button

Then I worked rows of back stitch around the spokes, to make a kind of woven web out from the centre. I worked eight complete rounds of back stitch (rather than the five recommended in the instructions). I was so intent on keeping the thread taut while I did this, that I didn’t notice that I was getting more and more off-centre, unfortunately.

How to make a Dorset button

On the final, ninth, row, I included a bead between each spoke while doing the back stitch (I changed to a betweens 10 needle for this, as the tapestry needle was too fat to get the beads on).

How to make a Dorset button

Then I took the thread up at the back of the button and over the edge of the ring to the outer end of a spoke, and wrapped the two threads (front and back) of each spoke as I worked my way back to the bead. Then I put the needle through the next bead, and repeated the process until all spokes were wrapped. Really fiddly!!!!

As I had decided not to work the edging stitch around the ring by this point, although the instructions said to take the needle to the outer edge at the end of adding all the beads ready to do the edging, I took it into the centre, using the last of the thread length to attach the Dorset button to the front of the heart etui panel. IT MUST BE DONE NOW rather than later on, as, once the panel has been laced over the heart shape made from template plastic, it wouldn’t be possible to stitch the button in place. The instructions, however, state that the button is attached ‘once construction is complete’ WHICH IS WRONG!!!

Here’s my Dorset button, once attached to the front heart panel (I’ll explain how I did the lacing in next week’s blog post). I stitched it on with the off-set centre made to look as if it’s a design feature  🙂 My button is definitely a lot larger than the one in the magazine. It’s a bit too prominent for my liking, as a part of the panel’s design as a whole, but I’m not making another one. Ever. Sometimes, you have to do something once, in order to know that you don’t ever want to do it again  🙂

How to make a Dorset button

Here’s the front panel of the heart etui from the magazine – you can see that the button on that one is smaller and more dainty than mine.How to make a Dorset button

Oh well, at least it’s finished! I hope yours comes out more successfully than mine!

~~~~~~~~~~~~~  ***  ~~~~~~~~~~~~~

~~~INFORMATION~~~

The Strawberry Fayre design, plus the complete list of materials, appears in Inspirations magazine number 95The publishers do sell a full materials pack  (not including the mother of pearl ruler though!), but it’s rather expensive, so if you can use your stash, and just fill in with bits and pieces, then so much the better! The magazine is published in Australia – if you live in the UK, as I do, it is cheaper to buy a back copy from Manor House Magazines, and save a lot on the shipping. 

EDIT: The materials pack from Inspirations, and the magazine from Manor House in the UK are not available any more as at March 2018 – I don’t know if any more stocks will be available now, unfortunately. The publishers may bring out a digital pattern pack later, which they sometimes do with popular projects from their magazines, but we’ll have to wait and see…..

To read about this project stitchalong from the beginning, start here. The post about which FABRIC to use is here. The post about the THREAD SUBSTITUTIONS that I made, plus WHERE TO BUY the threads and beads, etc., is here.

To look up all the posts in this series in the sidebar, see under the CATEGORIES list, under: Embroidery / Full size (others’ designs) / Strawberry Fayre heart etui, or use the SEARCH BOX at the top of the blog, and search for ‘Strawberry Fayre’ to get a list of all the posts (but it’s in reverse order, sorry!).

I’d be interested to see images of how your project is progressing – please email large, clear, well-focused images to mail@janetgranger.co.uk  Please bear in mind that any images sent may be used in this blog and/or social media such as Facebook or Pinterest.

~~~~~~~~~~~~~~~~~~~~~~~~~~~~~~~~~~~~~~~~

Are you interested in doll’s houses and stitching? Then why not visit my website, where you can buy doll’s house needlepoint kits to make all kinds of soft furnishings for one-twelfth scale dollhouses. There are over 280 kits to choose from, plus chart packs, fabric project packs, tutorials, and lots of eye candy to inspire you! Kits are available on 18 and 22 count canvas, 28 and 32 count evenweave, and 32 and 40 count silk gauze, so there’s something for everyone – from beginners to experts.

~~~~~~~~~~~~~~~~~~~~~~~~~~~~~~~~~~

Dollhouse Needlepoint newsletter sign-up invitation


Carolyn Pearce Strawberry Fayre heart etui 27: the strawberry emery

I am currently stitching the Carolyn Pearce Strawberry Fayre heart etui as a stitchalong project. I am now ready to make the strawberry emery. See the end of this post for all the information you’ll need to join in!

~~~~~~~~~~~~~  ***  ~~~~~~~~~~~~~

The strawberry emery is, I think, what gives this project its name, and not the rather ‘raspberry-looking’ beaded berries on the etui itself! It’s a very cute little strawberry, but a bit fiddly to make, and I found that I needed to change quite a few things along the way to successfully make this. Here’s the image from Inspirations number 95, so you know what we’re aiming for:

Strawberry Fayre heart etui

The instructions said to make the emery strawberry from velveteen. Yeah, right. Anyone know where you can buy a four inch square piece of velveteen these days? Me neither. So I used felt instead, which worked fine. I also used a small piece of quilter’s muslin for the lining.

Strawberry Fayre emery

The strawberry emery is attached with a cord to the very bottom tip of the heart etui itself eventually. It helps to make this cord first, as it gets a bit complicated later on when you start to need several pairs of hands. At first, I tried to make the cord using alternating half hitch knots, as the instructions suggested. But it quickly became obvious that this type of cord would be far too thick to go through the holes in the beads that I’d bought. And my cord looked messy  😦

Strawberry Fayre heart etui emery

So, I made a ‘normal’ twisted cord instead, which came out neater and thinner. I used  2 lengths of DMC Perle 8 Avocado green, each cut 36 inches long. I knotted the lengths to each other at each end, making a loop two yards round, with two knots in it. I clamped one of the knotted ends under the presser foot of my sewing machine, and held the two lengths out taut, then put a pencil in the loop, and started twisting the two lengths together until they started to kink back on themselves. Then I folded the cord in half and let it twist up on itself, knotting the loose ends together at the sewing machine end to stop them unravelling, eventually making a cord 13 inches long. This was way more than I needed, but meant that I had plenty to play with!

Strawberry Fayre heart etui cord

I folded the felt and muslin in half, and stitched the seam with backstitch (by hand, rather than using a sewing machine, as I could control things better!). The very tip of the cone needs a slight rounding off, so that the strawberry doesn’t end up too pointy.

Strawberry Fayre heart etui emery

With the lining, I did a line of running stitch around the top edge, folding a seam allowance in as I went. In theory, now is the point to put the emery powder in, before drawing up the threads and tying them off tightly to make the berry shape. In practice, I cheated, and used cotton wool. I find that emery powder always falls out, making the embroidery messy with little black dots, so my ‘strawberry emery’ is a fake one!

Strawberry Fayre heart etui emery

Here’s the lining once I’d tied off the gathering threads:

Strawberry Fayre heart etui emery

The felt strawberry has lines of seed stitches worked all over it, in offset rows, in yellow:

Strawberry Fayre heart etui emery

To attach the cord to the strawberry, first I knotted the cord at the ‘untidy’ end, leaving the other end ‘neat’ (this is important later, when you come to attach the cord to the heart etui itself). The total length from the knot to the neat end is about five inches. To be able to thread the  gold bead cap and cloisonne bead onto the cord, I looped a needle threaded with sewing cotton through the loop at the neat end of the cord, and then while the needle was still attached, I threaded on the bead cap and bead, and pushed them down the sewing thread and onto the cord. I’ve no idea how they managed to thread on the bead and cap on the one in the magazine pictures, as it just says ‘thread the cut ends of the cord through a cloisonne bead’. Have you ever tried doing that?! Great way to waste  a whole afternoon.

Strawberry Fayre heart etui emery cord

The filled lining is placed inside the felt shape, and the end of the cord is then placed inside, knotted end in first, before drawing up the  top edge of the strawberry with gathering stitches and tying off tightly. Stitch through the knot itself a few times as you go, to make sure the knot won’t slip out.

Strawberry Fayre heart etui emery

If I’d have used velveteen, I would have had to turn in a seam allowance, but as I used felt, I didn’t need to, but I think my strawberry is therefore a bit bigger than it should be. Should have trimmed it!

Strawberry Fayre heart etui emery attaching cord

While the cord still has the bead and cap loose, as in the image above, I stitched some Lazy Daisy stitches around the top of the strawberry, for leaves. The instructions said to do needle woven picots for leaves instead, but I was losing the will to live by now.

Strawberry Fayre heart etui emery

Finally, the gold bead cap and cloisonne bead are pushed down tightly until they touch the top of the strawberry, and the cord is knotted just above the cloisonne bead, holding them both in place. The sewing cotton can now be removed from the other end of the cord, and the strawberry emery is complete!

Strawberry Fayre heart etui emery completed

Ta-dah!!! It’s very pretty, but so fiddly to make!

The next thing I need to assemble is the Dorset button closure for the front heart, which should be easy, by comparison…….

~~~~~~~~~~~~~  ***  ~~~~~~~~~~~~~

~~~INFORMATION~~~

The Strawberry Fayre design, plus the complete list of materials, appears in Inspirations magazine number 95The publishers do sell a full materials pack  (not including the mother of pearl ruler though!), but it’s rather expensive, so if you can use your stash, and just fill in with bits and pieces, then so much the better! The magazine is published in Australia – if you live in the UK, as I do, it is cheaper to buy a back copy from Manor House Magazines, and save a lot on the shipping. 

EDIT: The materials pack from Inspirations, and the magazine from Manor House in the UK are not available any more as at March 2018 – I don’t know if any more stocks will be available now, unfortunately. The publishers may bring out a digital pattern pack later, which they sometimes do with popular projects from their magazines, but we’ll have to wait and see…..

To read about this project stitchalong from the beginning, start here. The post about which FABRIC to use is here. The post about the THREAD SUBSTITUTIONS that I made, plus WHERE TO BUY the threads and beads, etc., is here.

To look up all the posts in this series in the sidebar, see under the CATEGORIES list, under: Embroidery / Full size (others’ designs) / Strawberry Fayre heart etui, or use the SEARCH BOX at the top of the blog, and search for ‘Strawberry Fayre’ to get a list of all the posts (but it’s in reverse order, sorry!).

I’d be interested to see images of how your project is progressing – please email large, clear, well-focused images to mail@janetgranger.co.uk  Please bear in mind that any images sent may be used in this blog and/or social media such as Facebook or Pinterest.

~~~~~~~~~~~~~~~~~~~~~~~~~~~~~~~~~~~~~~~~

Are you interested in doll’s houses and stitching? Then why not visit my website, where you can buy doll’s house needlepoint kits to make all kinds of soft furnishings for one-twelfth scale dollhouses. There are over 280 kits to choose from, plus chart packs, fabric project packs, tutorials, and lots of eye candy to inspire you! Kits are available on 18 and 22 count canvas, 28 and 32 count evenweave, and 32 and 40 count silk gauze, so there’s something for everyone – from beginners to experts.

~~~~~~~~~~~~~~~~~~~~~~~~~~~~~~~~~~

Dollhouse Needlepoint newsletter sign-up invitation


Carolyn Pearce Strawberry Fayre heart etui 26: stitching the strawberry pinwheel

I am currently stitching the Carolyn Pearce Strawberry Fayre heart etui as a stitchalong project. This week I have been stitching the strawberry pinwheel – both the strawberry side and the side with my initial on. See the end of this post for all the information you’ll need to join in!

~~~~~~~~~~~~~  ***  ~~~~~~~~~~~~~

The strawberry pinwheel is one of the three ‘dangleys’ (maybe they should really be called ‘chatelaine pieces’?!) that hang from the centre point of the etui when it is closed. This is the image of it when completed, from the Inspirations magazine article:

Carolyn Pearce Strawberry Fayre heart etui

The side not shown above is the ‘strawberry side’. Now, as I’ve mentioned before, there is some debate as to whether this is a strawberry or a raspberry. In the magazine, they call it a strawberry, whereas I think it’s a raspberry, but there you go….

Anyway, it’s stitched as on the front of the etui itself, so refer back to that blog post for detailed instructions on how to stitch it – the Beaded Oyster Stitch takes some practice, but I think my berries are getting neater each time I do them. This is the twelfth one I have stitched.

I still find that it’s best to start with five beads down the centre of the berry, and then ‘flood fill’ with the rest, to cover the felt padding shape.

Carolyn Pearce Strawberry Fayre heart etui

The sepals are made from three needlewoven picots stitched with one strand of Anchor stranded cotton 268, with four Lazy Daisy stitches in one strand of the same thread underneath them to give depth, highlighted with copper metallic thread.

Carolyn Pearce Strawberry Fayre heart etui

The other side of the pinwheel is my initial, ‘J’. I never really like using my initial on embroidered things, as the letter J in most fancy fonts is barely readable. Is it a J, or an I, or an F, or a T?! The font given on the pullout sheet in the Inspirations magazine is quite a ‘flowery’ one, and I tried to simplify the J to make it more readable, but I think I failed – it looks like a T to me.

Carolyn Pearce pinwheel

The initial itself is outlined in Back Stitch with one strand of Anchor 267 (substitute). Then tiny French knots are worked in copper metallic thread, using two wraps around the needle each time for the centre one, and one for the ones on either side.

Carolyn Pearce pinwheel

The little flowers are made as on the pincushion top – five French knots in pink, around a French knot centre in yellow. Little detached Chain Stitch leaves are randomly worked around the flowers with Anchor stranded cotton 265 and the copper metallic thread.

Carolyn Pearce pinwheel

The top and bottom of this pinwheel will be joined together with a gusset of grosgrain ribbon, eventually.

I’ve now stitched all of the pockets and smalls that make up the pieces on my hooped fabric. I’ve just got the two strawberries (the emery one and the needlelace one) to do, plus the Dorset button closure, before starting to assemble everything.

Carolyn Pearce Strawberry Fayre smalls

Next up is the strawberry emery…..I’m getting there, slowly!!

~~~~~~~~~~~~~  ***  ~~~~~~~~~~~~~

~~~INFORMATION~~~

The Strawberry Fayre design, plus the complete list of materials, appears in Inspirations magazine number 95The publishers do sell a full materials pack  (not including the mother of pearl ruler though!), but it’s rather expensive, so if you can use your stash, and just fill in with bits and pieces, then so much the better! The magazine is published in Australia – if you live in the UK, as I do, it is cheaper to buy a back copy from Manor House Magazines, and save a lot on the shipping. 

EDIT: The materials pack from Inspirations, and the magazine from Manor House in the UK are not available any more as at March 2018 – I don’t know if any more stocks will be available now, unfortunately. The publishers may bring out a digital pattern pack later, which they sometimes do with popular projects from their magazines, but we’ll have to wait and see…..

To read about this project stitchalong from the beginning, start here. The post about which FABRIC to use is here. The post about the THREAD SUBSTITUTIONS that I made, plus WHERE TO BUY the threads and beads, etc., is here.

To look up all the posts in this series in the sidebar, see under the CATEGORIES list, under: Embroidery / Full size (others’ designs) / Strawberry Fayre heart etui, or use the SEARCH BOX at the top of the blog, and search for ‘Strawberry Fayre’ to get a list of all the posts (but it’s in reverse order, sorry!).

I’d be interested to see images of how your project is progressing – please email large, clear, well-focused images to mail@janetgranger.co.uk  Please bear in mind that any images sent may be used in this blog and/or social media such as Facebook or Pinterest.

~~~~~~~~~~~~~~~~~~~~~~~~~~~~~~~~~~~~~~~~

Are you interested in doll’s houses and stitching? Then why not visit my website, where you can buy doll’s house needlepoint kits to make all kinds of soft furnishings for one-twelfth scale dollhouses. There are over 280 kits to choose from, plus chart packs, fabric project packs, tutorials, and lots of eye candy to inspire you! Kits are available on 18 and 22 count canvas, 28 and 32 count evenweave, and 32 and 40 count silk gauze, so there’s something for everyone – from beginners to experts.

~~~~~~~~~~~~~~~~~~~~~~~~~~~~~~~~~

Dollhouse Needlepoint newsletter sign-up invitation