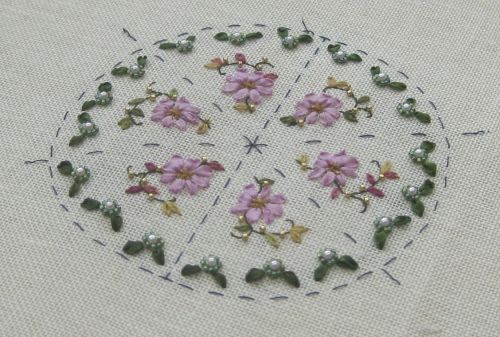
I’m currently stitching this gorgeous pincushion on a wooden base from a Victoria Sampler chart booklet in my stash. I’ve done the ribbon embroidery centre of the design, and now I’m up to the beaded flower border.
As I said last time, I found, as I started to stitch this border, that it really helped with the placement of the embroidery stitches for the flowers to EXACTLY copy the position of the tacking stitches from the chart as I was marking out the fabric in advance of doing the stitching. What I mean is, if the central vertical tacking stitch line, for instance, goes over four threads each time, then reproduce that – don’t do six threads, then four threads, then five threads, etc., as if it doesn’t matter, because it will make counting out from a tacking stitch line to the starting point of a flower more difficult if your stitches vary in length from the chart.
I found this out when I started doing the first little beaded flower:
The actual flower is easy – two tiny seed beads stitched in place on each side of a square, with a larger pearl bead secured in the centre. What was really difficult at first was working out the exact PLACEMENT! I kept getting it wrong! Each beaded flower is quite a long way away from any other element, and to count out from a ribbon embroidery stitch was too hit and miss anyway. The tacking stitch lines made it easier.
What I also found to be really helpful was to first make a cross stitch in beige thread that matched the fabric as much as possible, in the space that the pearl bead would eventually be stitched, and then place the little green beads around the four sides of that cross next, and stitch the pearl bead in place last, pulling it into position so that it nestled down among the green seed beads.
Finally, once the beaded flowers were all done, I added the outer border of dark green leaves using the silk ribbon.
At this point, it was important not to go ‘Great! I’ve finished it!’, and undo the tacking lines, as they are necessary for the assembly part next.
~~~~~~~~~~~~~~~~~~~~~~~~~~~~~~~~~~


Hi, Janet. You make the most exquisite things. I found your blog when I bought the Carolyn Pearce’s book with the idea of undertaking the Home Sweet Home project at some point. Since then I love having a glimpse of what you are up to. So many gorgeous projects!
Thank you! I love stitching, and I love blogging. Glad you’ve found it inspiring 🙂
Janet, thanks for this explanation as it could be useful in other projects where exact counting is essential. Love, love, love your blog and your beautiful work
Tkank you!
That is such a pretty design and those beaded flower clusters are exquisite! 😍
Pretty, aren’t they?