Embroidery in progress: An Elizabethan Stumpwork Bride’s Bag – 11

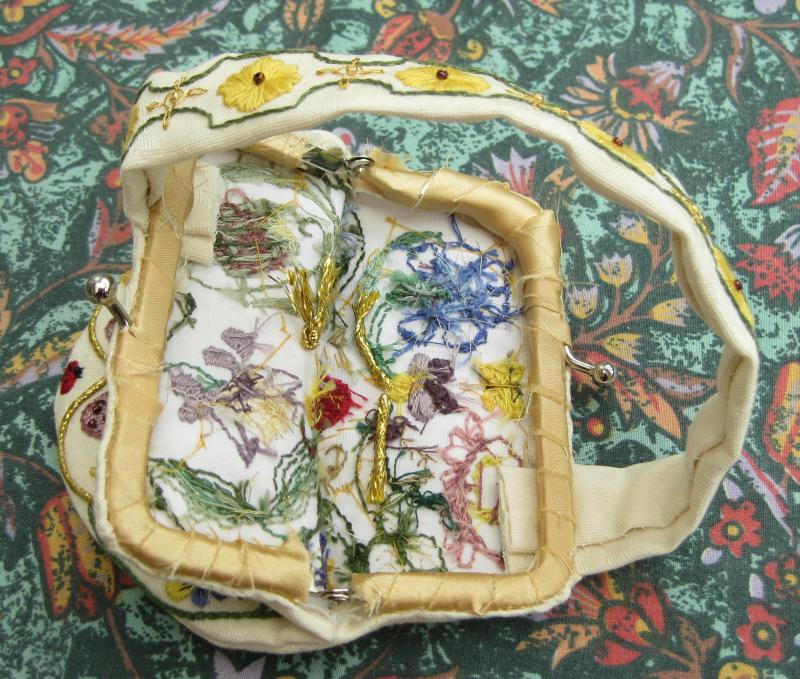
I didn’t take any ‘ in progress’ photos while I was actually stitching the lining into my bride’s bag, as I found that if I let go of it for even a second, it all slid about and went wrong! Not the easiest of stages to complete, but I’m pleased with how it’s come out, and it covers the messy back of the embroidery, and all of the binding, really well.

I attached the lining in the same way that I had with the embroidered side – using a few dressmaking pins to hold the lining onto the binding, and then slip stitching the lining in place. The instructions said to cover the binding completely, so that I was really slip stitching the lining to the embroidered fabric, rather than the binding. But it makes for a very neat finish, even if it did take ages!

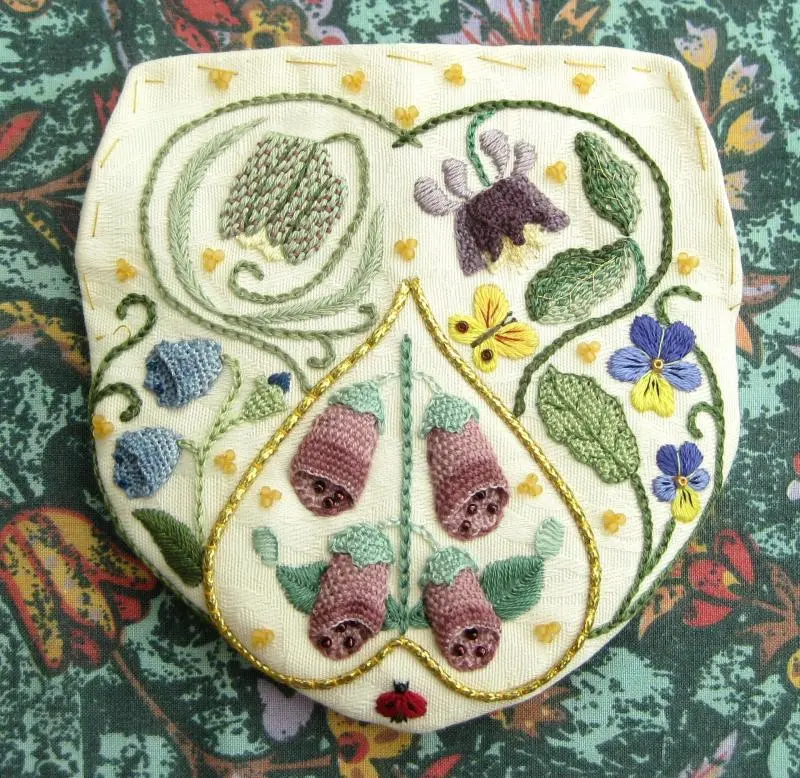
So….here it is, finally completed!

I’d like to thank Shirley Holdaway for designing such a lovely project. If you’d like to make one, the design is in the book ‘Festive Elizabethan Creations’, published by Georgeson Publications Ltd, of New Zealand, although it’s available in the UK at the moment (was out of print a while back, but not now).

I have been very inspired by doing this project. Partly due to the supportive comments I’ve had on this blog, and elsewhere, I’m going to start designing my own range of surface embroidery/stumpwork embroidery kits, to run alongside the miniature needlepoint kits that I already sell. See my website for details – I’ll have a newsletter sign-up form on there soon, so that as soon as some kits are ready, you’ll be the first to know!

~~~~~~~~~~~~~~~~~~~~~~~~~~~~~~~~~~

Dollhouse Needlepoint newsletter sign-up invitation


Embroidery in progress: An Elizabethan Stumpwork Bride’s Bag – 10

I’ve been attaching the embroidery for the bride’s bag to the metal purse frame, and I’m actually pleased with how it’s turning out, now.

The instructions said to stitch a seam half inch in from the edge, using a sewing machine. But even with a zipper foot, I wasn’t convinced that that would be successful, as there is beading and couched gold thread right up to the very edge of the bag, so I backstitched the seam by hand, from the point each side where the purse frame’s hinges will come to. I did the same to the gold satin lining, too. This photo shows the back of the ‘strawberry side’ stitching. Make the most of it – I don’t usually let people see the back of my work!

I clipped the seam allowance every half inch or so, to make turning easier. In this picture, you can see that I’ve trimmed the underlining cotton fabric that I used while stitching the embroidery, right up to the stitching, to reduce bulk.

Once the bag had been turned right side out, I checked the width of the top edge against the purse frame, then turned in the top and side seam allowances, and tacked them in place.

This picture looks really complicated, but it was actually quite easy to stitch the bag to the frame. Starting at one hinge side, I slip stitched with tiny stitches up the frame, along the top and down the other side. I’d used three or four dressmaking pins to hold the bag to the wrapped binding, to make sure the bag didn’t slip out of place at I attached it, which I found was very necessary. At the beginning of the top straight edge on each half, I inserted the strap, and slip stitched from both sides of the strap to the binding and the embroidery, to make sure the strap was tightly attached, checking to make sure it was the correct length before stitching down the second end.

But doesn’t the inside of the bag need tidying up?! Can’t face doing it tonight…I’d only do it wrong if I do it when I’m tired…

~~~~~~~~~~~~~~~~~~~~~~~~~~~~~~~~~~

Dollhouse Needlepoint newsletter sign-up invitation


Embroidery in progress: An Elizabethan Stumpwork Bride’s Bag – 9

On the whole, I’m not too keen on assembling any embroidery that I have made. After all that work, it could go horribly wrong, so I tend to put it off!I’ve got to the point now where I am sewing the two sides of my bride’s bag together, and attaching them to the purse frame.

This shows the two sides of the bag. I realised, as I took this picture, that it’s the last time that these two pieces of embroidery will ever be seen alongside each other (unless someone in the future takes my bag apart, that is!).

I made a second set of bag sides, and some narrow strips of fabric to bind the purse frame, all from the gold satin that I’m going to use to line the bag.

Tacking the end of one length of the binding to itself, I began wrapping the binding around the frame, so that I’d have something to slip stitch the bag to, and also to attach the lining to. Hopefully, I can successfully hide all of this when the bag is finished, as, at the moment, it doesn’t look too tidy  😦

~~~~~~~~~~~~~~~~~~~~~~~~~~~~~~~~~~

Dollhouse Needlepoint newsletter sign-up invitation


Embroidery in progress: An Elizabethan Stumpwork Bride’s Bag – 8

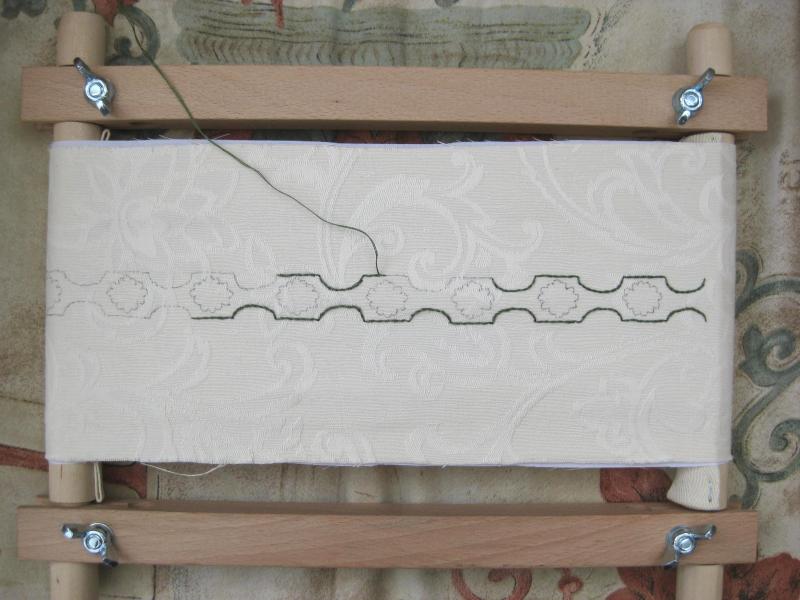
I’ve been making the strap for my bride’s bag this past weekend. I switched from using a Susan Bates hoop, to using a rectangular frame for this, as I didn’t want the hoop to crush the stitches on a long length of embroidery.

Shirley Holdaway, in her book ‘Festive Elizabethan Creations’ (where this design comes from), doesn’t say how long the strap needs to be, other than to say it needs to comfortably slip over your wrist, so I overdid the length I stitched, to be on the safe side, then had the frustrating experience of having to cut off several inches of stitching and throw it away  😦

In the book, several possible patterns are given for the strap, but only the version on the cover is shown stitched, so it was up to me to decide how I wanted to interpret the pattern for my strap, as I’d chosen a pattern that was only shown as a line drawing. I started by outlining with dark green (Anchor 860) using two strands, and stem stitch. Then I worked the diamonds with back stitched sides, and individual chain stitches at each point, with a gold bead in the centre of each diamond.

The flowers were outlined in chain stitch using one strand of yellow (Anchor 295), and then filled in with long and short stitch. A  maroon Mill Hill bead was stitched in the centre of each flower to finish them off.

To make up the strap, I trimmed the fabric with a half inch seam allowance on one side, then pressed under the long edge with the narrow seam allowance first (not the embroidery, just the edge).

Then I trimmed the other long edge (leaving it wider than the first side, to allow for turning a hem). I pressed the small hem under, and  then another fold parallel so that the strap was now the correct width. Wrapping one side over the other, I then slip stitched the strap together, and pressed it gently from the back.

Now I’ve got the tricky bit to do next – putting it all together!

~~~~~~~~~~~~~~~~~~~~~~~~~~~~~~~~~~

Dollhouse Needlepoint newsletter sign-up invitation